
Social Shopping 101: How to Sell on Instagram, Facebook and Pinterest
by Ana Gotter


We all know that social media can do wonders for brand awareness, helping you spread your business’s message and establishing communities like no other. A combination of strong community building and powerful PPC campaigns have historically been the best way to sell on social.
And then Pinterest rolled out Buyable Pins, and everything changed a little bit, allowing users to purchase in-app directly from a pin. Facebook Shops also grew more popular, with brands treating a designated tab on their Pages like a little pop-up commerce shop. Instagram has since rolled out Shoppable Posts, and has even extended the features to Stories.
Now, social shopping looks completely different than it did even five years ago, creating a massive opportunity for ecommerce brands who want to find new ways to sell more wherever their audience is. In this post, we’re going to take a look at how to implement social shopping on Instagram, Facebook, and Pinterest to get more sales while supporting your ecommerce business.
What Counts as Social Shopping and Why Does It Matter?
You can get pretty vague with the definition of “social shopping” and include any sales that result from what users see on social media, but for the purpose of this post we’re getting more specific. In this context, we’re going to be using the word “social shopping” to describe the process of tagging products that provide users with key information, product images, and a link to purchase directly if they don’t check out natively through the platform.
Social shopping has the advantage of making it easier for users to discover your products. In addition to the increased visibility, the simple process of helping them see the product, get key information, and have the option to buy immediately will work in your favor. You can increase impulse purchases like never before, especially because it’s just so easy.
There are three types of social shopping platforms we’ll be looking at in this post: Facebook’s Shopping features, Instagram’s Shopping Features, and Pinterest’s Rich Pins.
Social Shopping on Facebook
Facebook Shops exist as a tab on your Facebook Page. You can upload product images, complete its full information like normal prices, sales prices, size options, and descriptions, and a link to purchase. You can sort your products by category, and users can search for what they’re looking for if they don’t see it right off the bat.
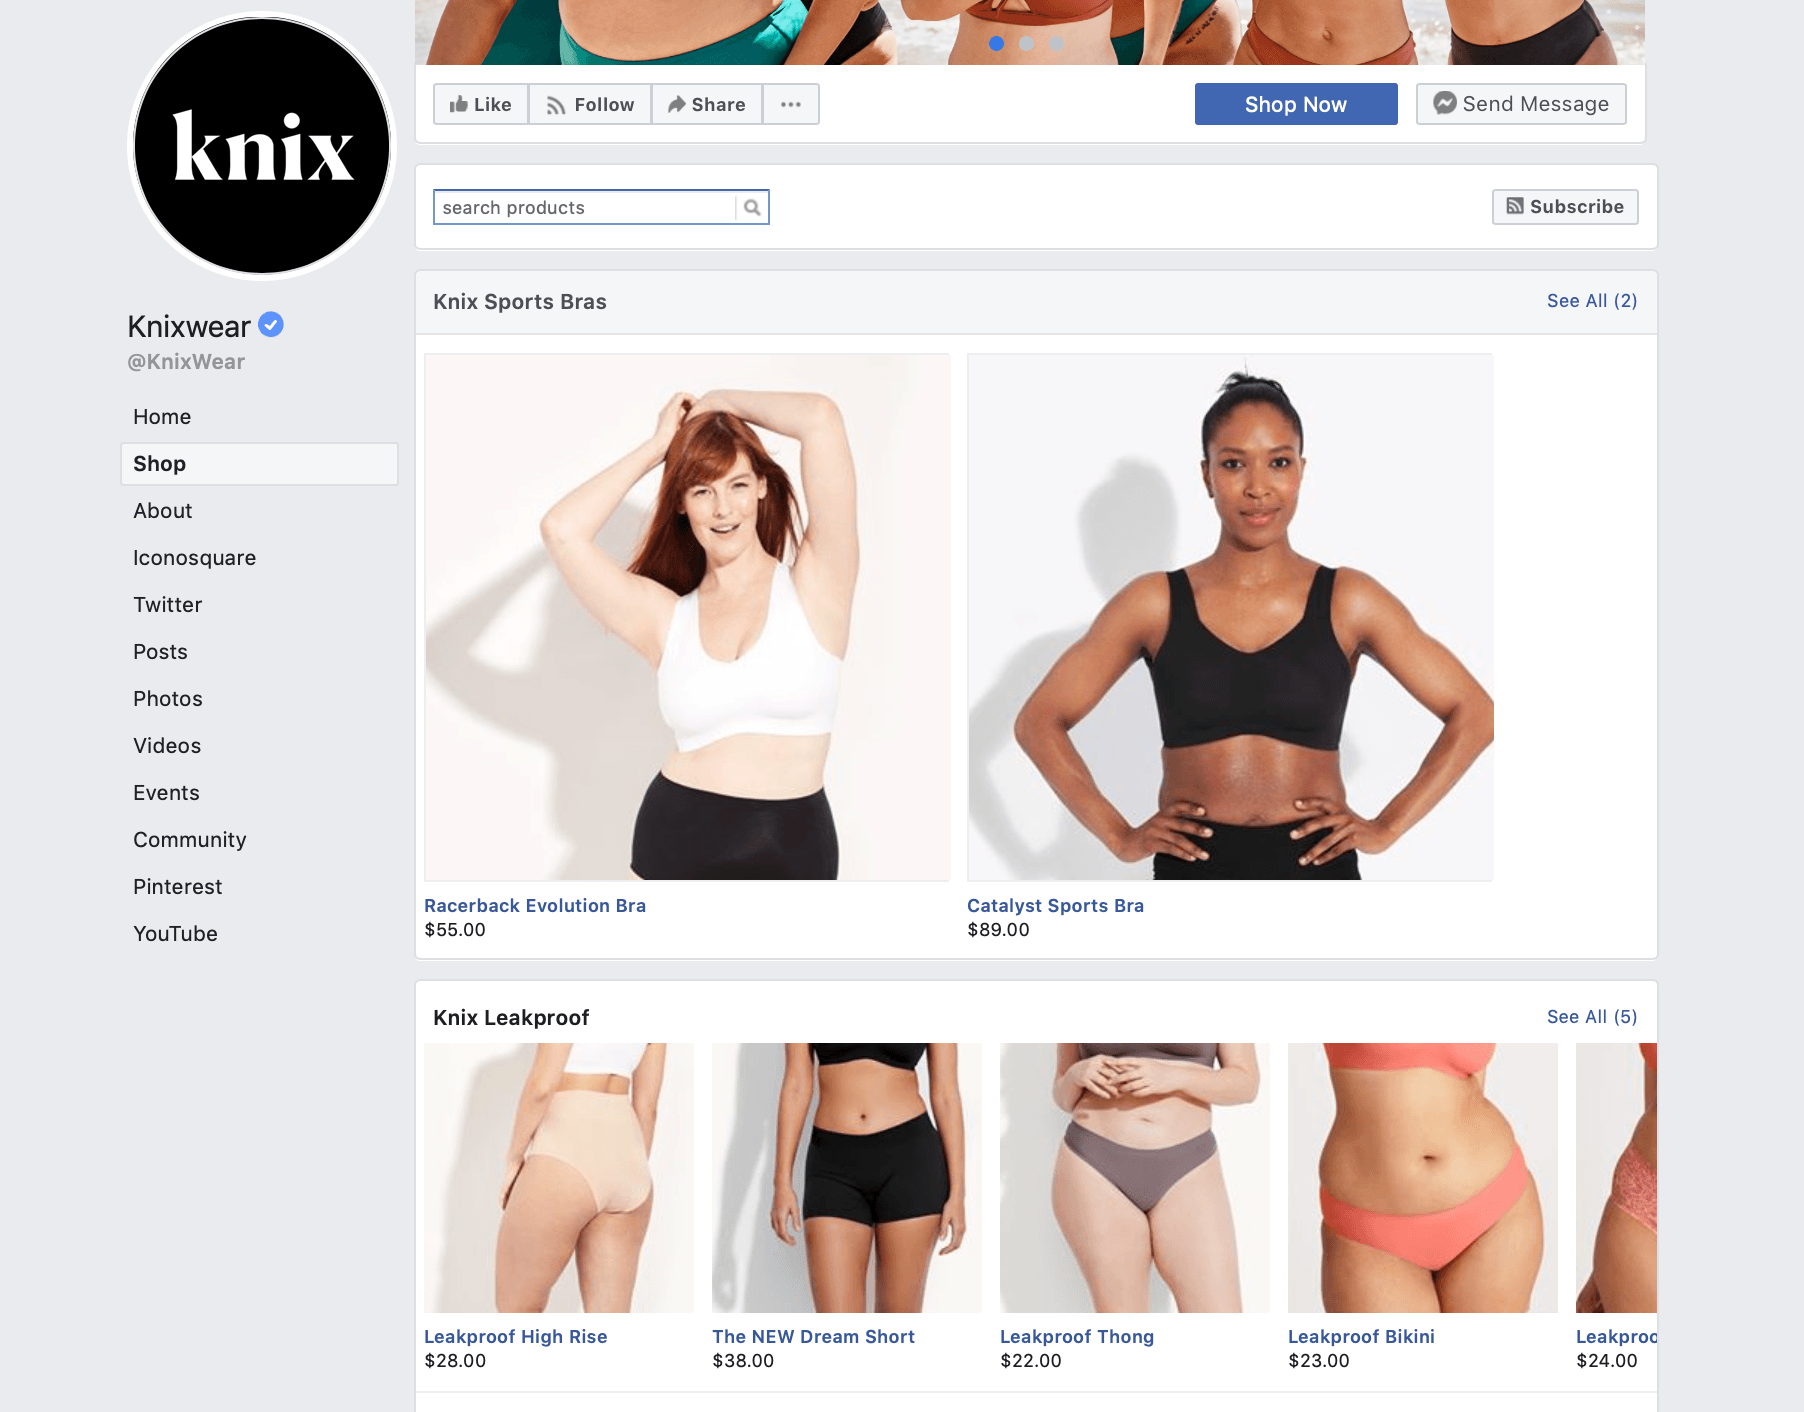
If you have a shop with uploaded products, you can also tag them in images you share your feed and even your cover photo. You can maximize the visibility of your products this way and hopefully entice users to come to the shop with a single click.
When someone purchases through Facebook, you’ll either be charged 5% per transaction in commissions, or a flat $0.40 fee if the transaction is $8.00 or less.
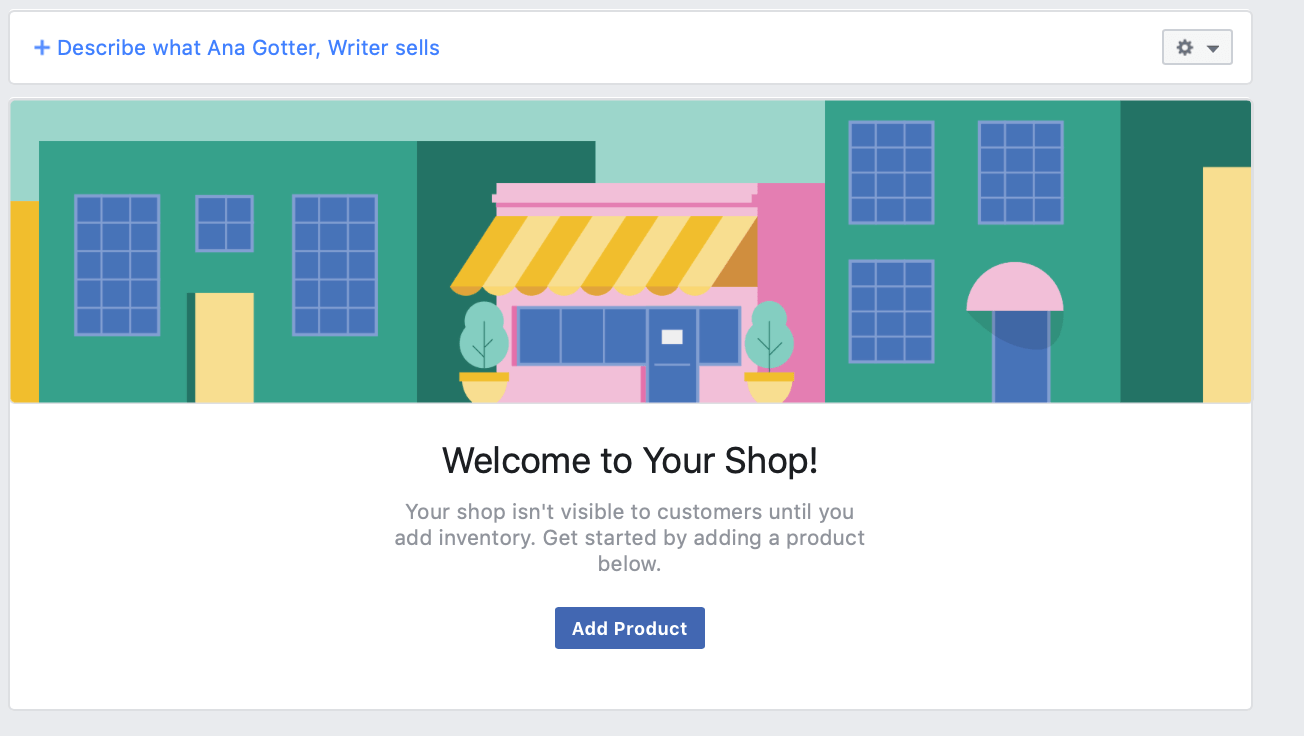
How to Set Up Your Facebook Shop
Navigate to your Facebook Page, go to your Settings, find “Templates and Tabs,” and then find and enable the Shop tab. Once you do this, you can go back to your Page, find the new tab, and then set up your Shop. 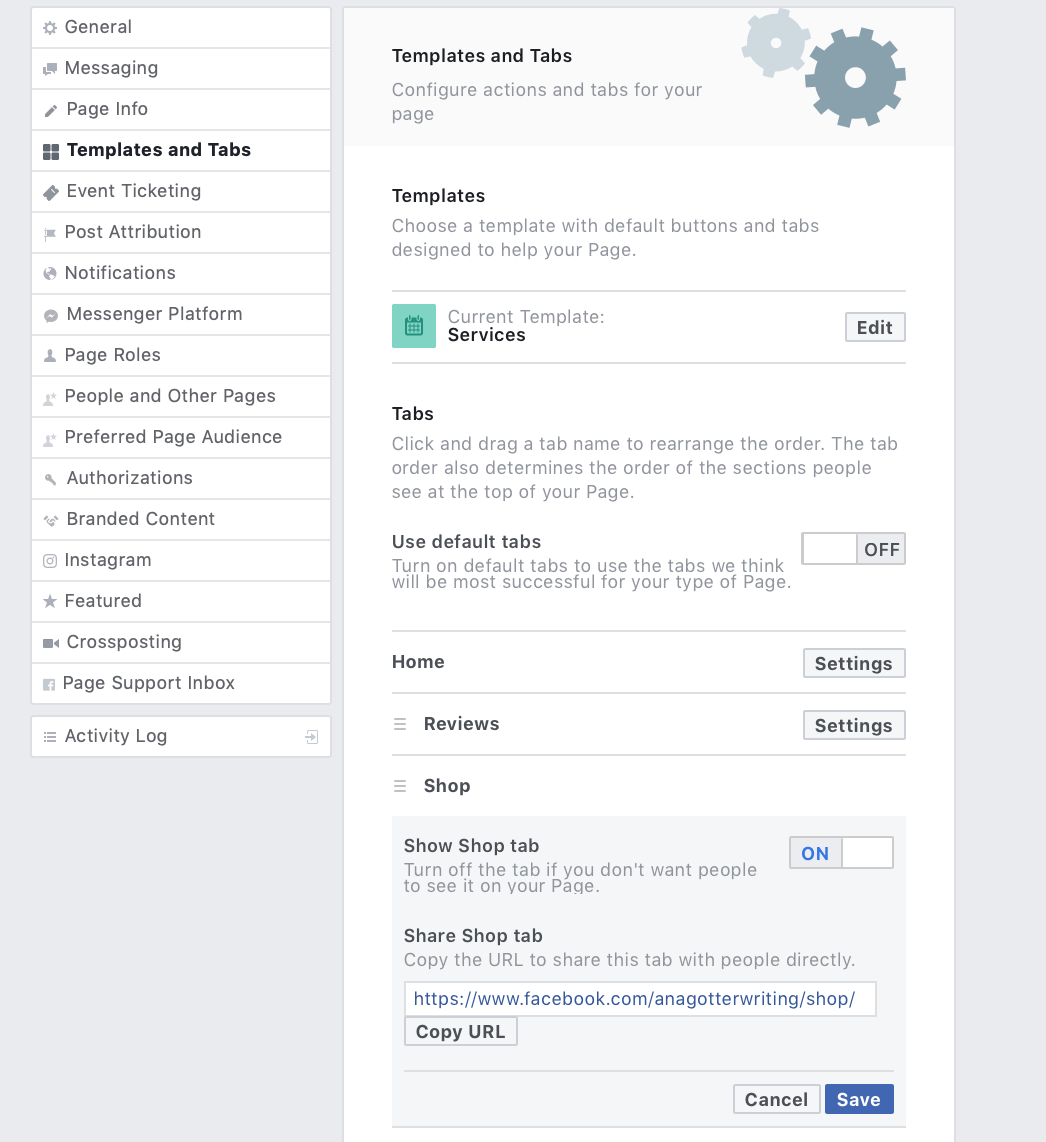
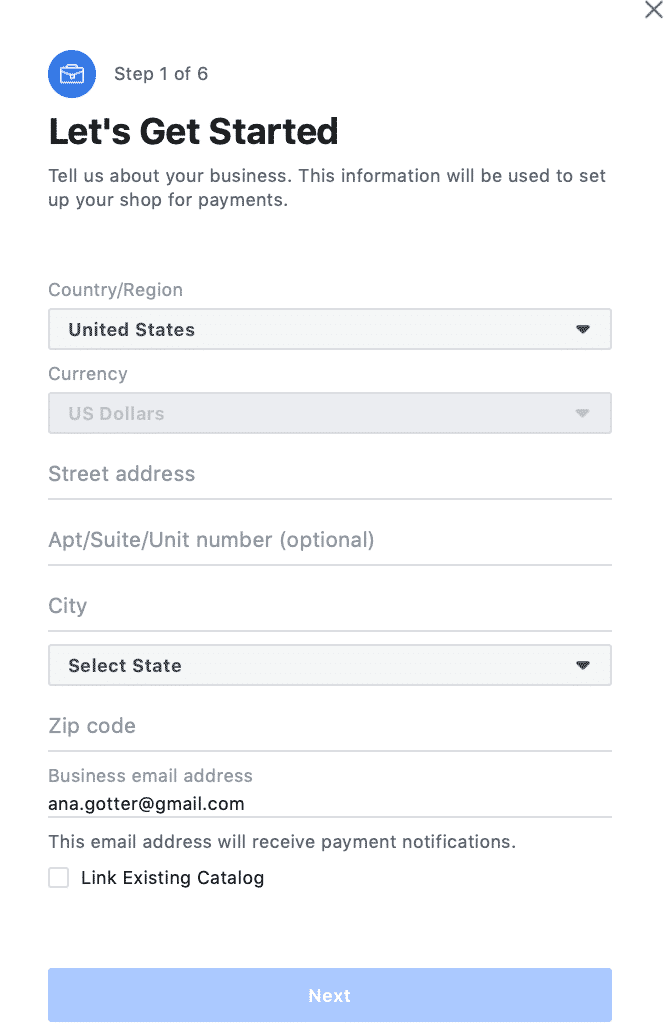
The setup process is thorough. They’ll ask for everything from your business’s address to your state license number to your bank account information. This is all so that they can make sure that things are legal and in order, allowing you to get paid and customers to stay safe.
At the end of the setup process, you will be asked to make decisions regarding shipping processes and return policies. Determine what length return policy you’d like to offer. You also need to determine what types of shipping you want to offer, how much it will cost, and 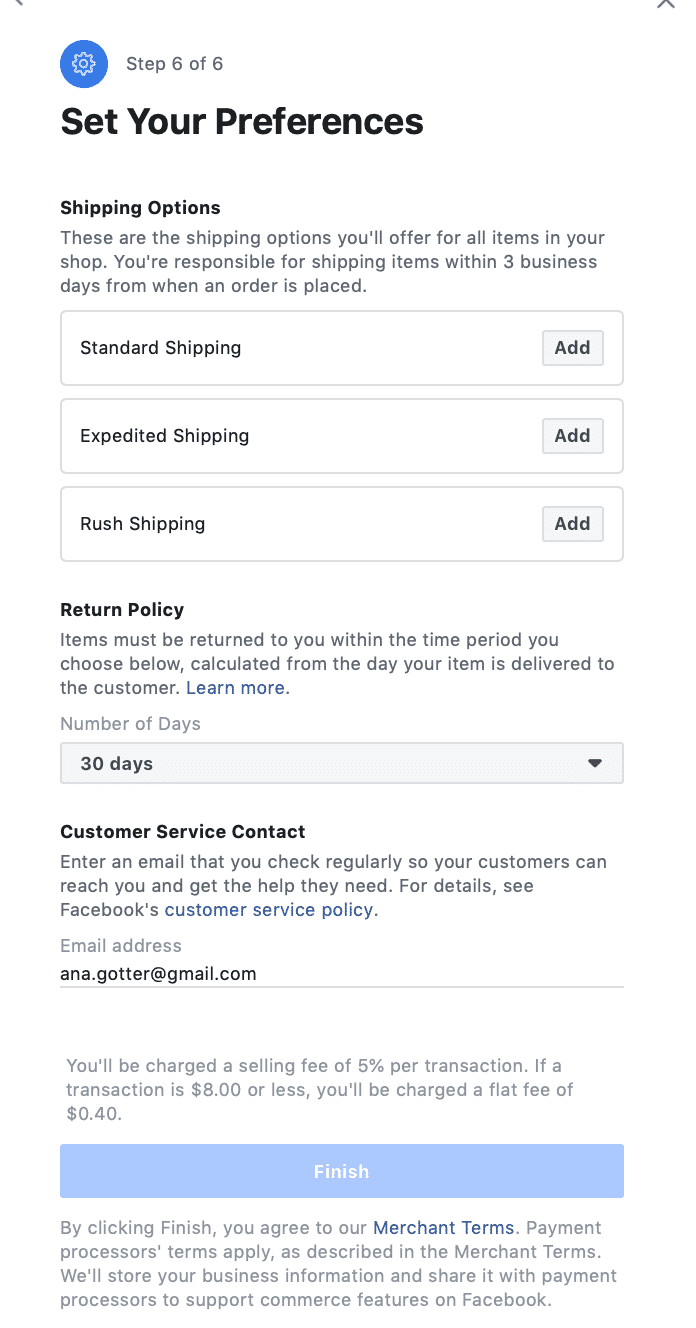
Once your shop is set up, you can add in a description about what your business does and sells. This is important. When users first discover your brand, you need to use this to encourage them to purchase.
Now you’re ready to start adding products. Upload images, list its price (and note if it’s on sale), add a description, and customize shipping speeds or return policies if needed.
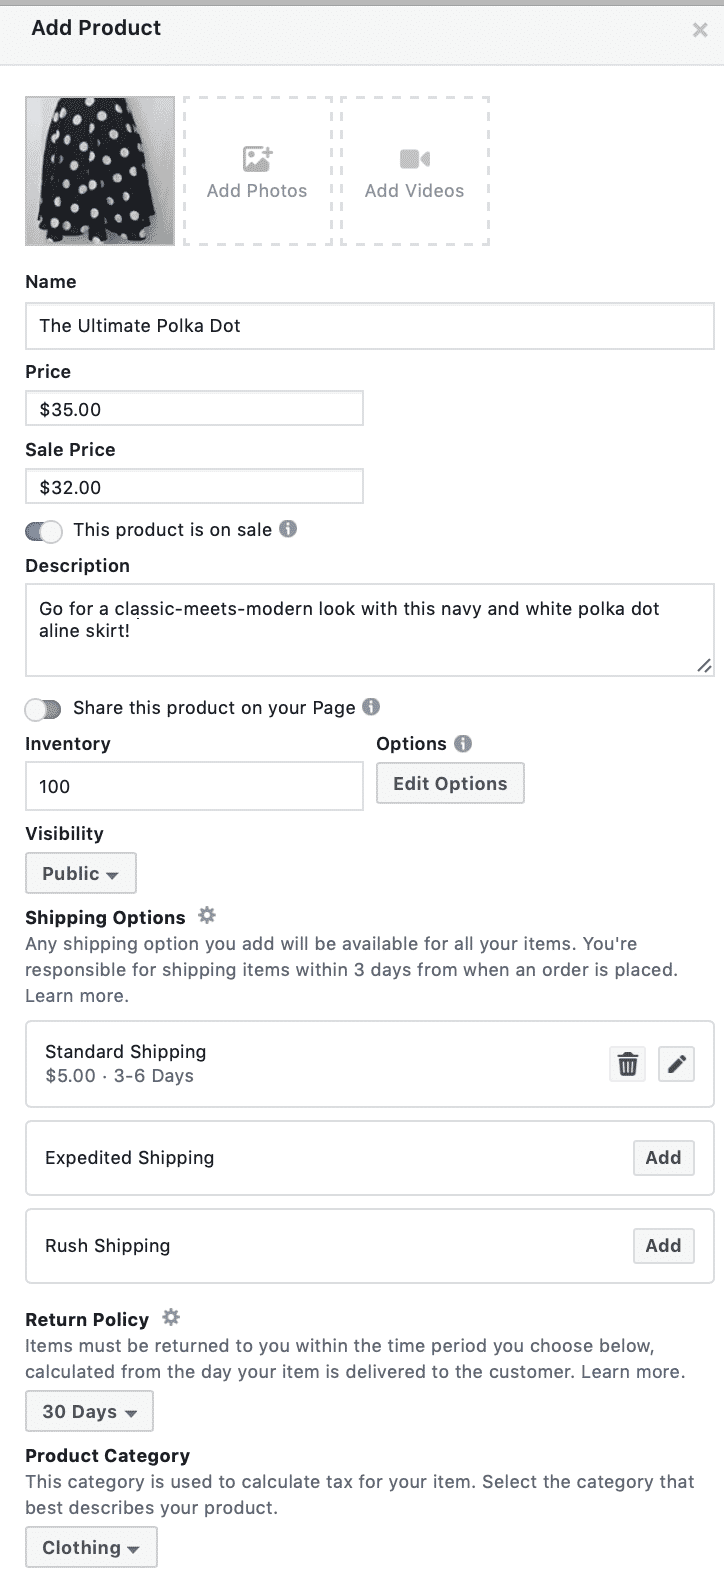
You can edit products at any point, and add them to a collection, grouping similar items in categories to make them easier to find and increase sales.
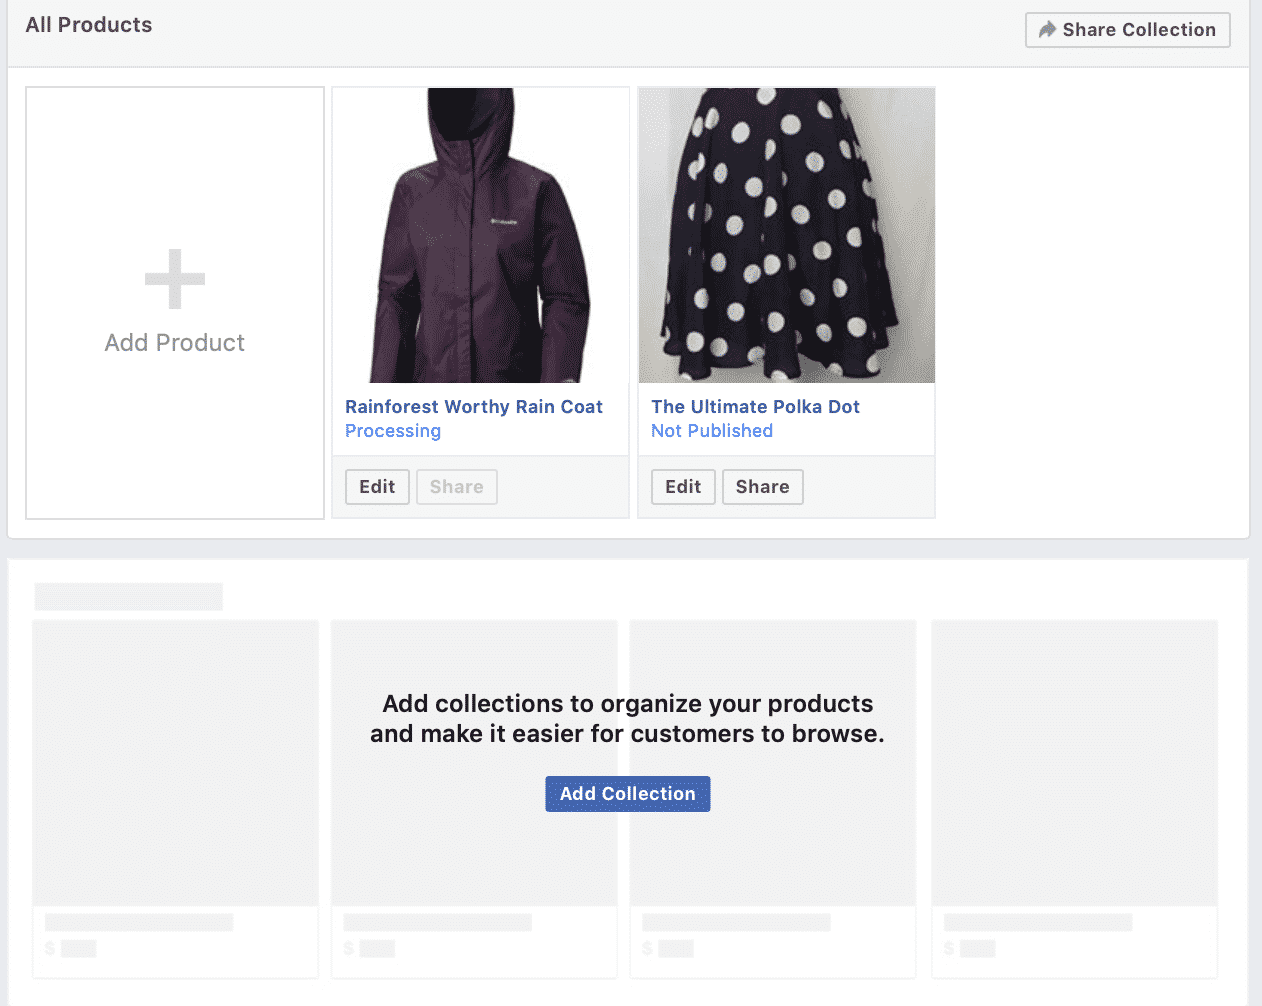
Once your Shop has been added, Facebook will review it. Sometimes this can take several days before it gets approved and you’re able to start selling, but once you are you’ll be good to go.
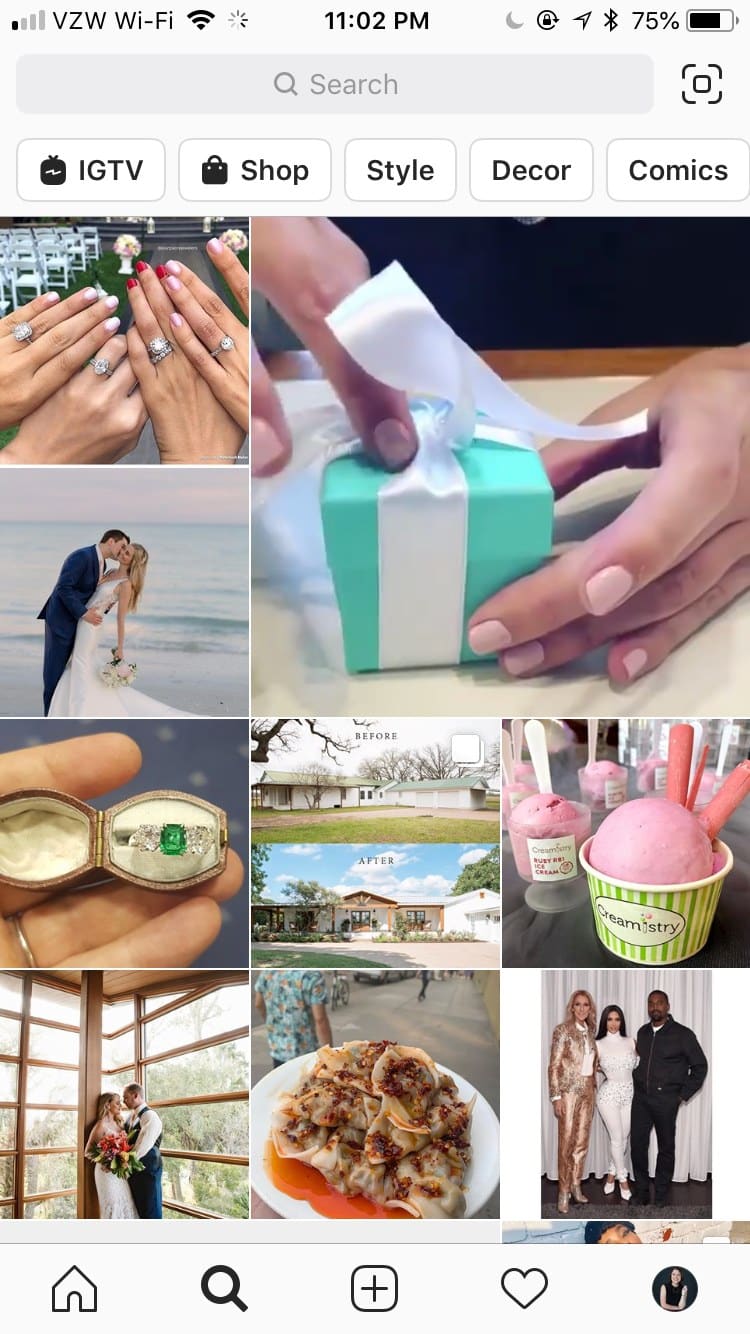
Social Shopping on Instagram
Right now, when most people think of social shopping, the first thing that will come to mind is likely going to be Instagram. Shoppable posts are wildly popular here with users and brands alike. Several early case studies reflected the potential for selling on the platform, including the following:
- Tyme—an ecommerce company selling hair styling tools—saw a 44% increase in traffic after implementing shoppable posts.
- Spearmint LOVE is an eco-friendly children’s clothing company who saw an 8% increase in revenue and a 25% increase in traffic thanks to shoppers on the platform.
- Lulus, a woman’s clothing company, was one of the first to use product tagging on Instagram, and claimed that the developments contributed to over 100,000 visits to their site and more than 1,200 product orders.
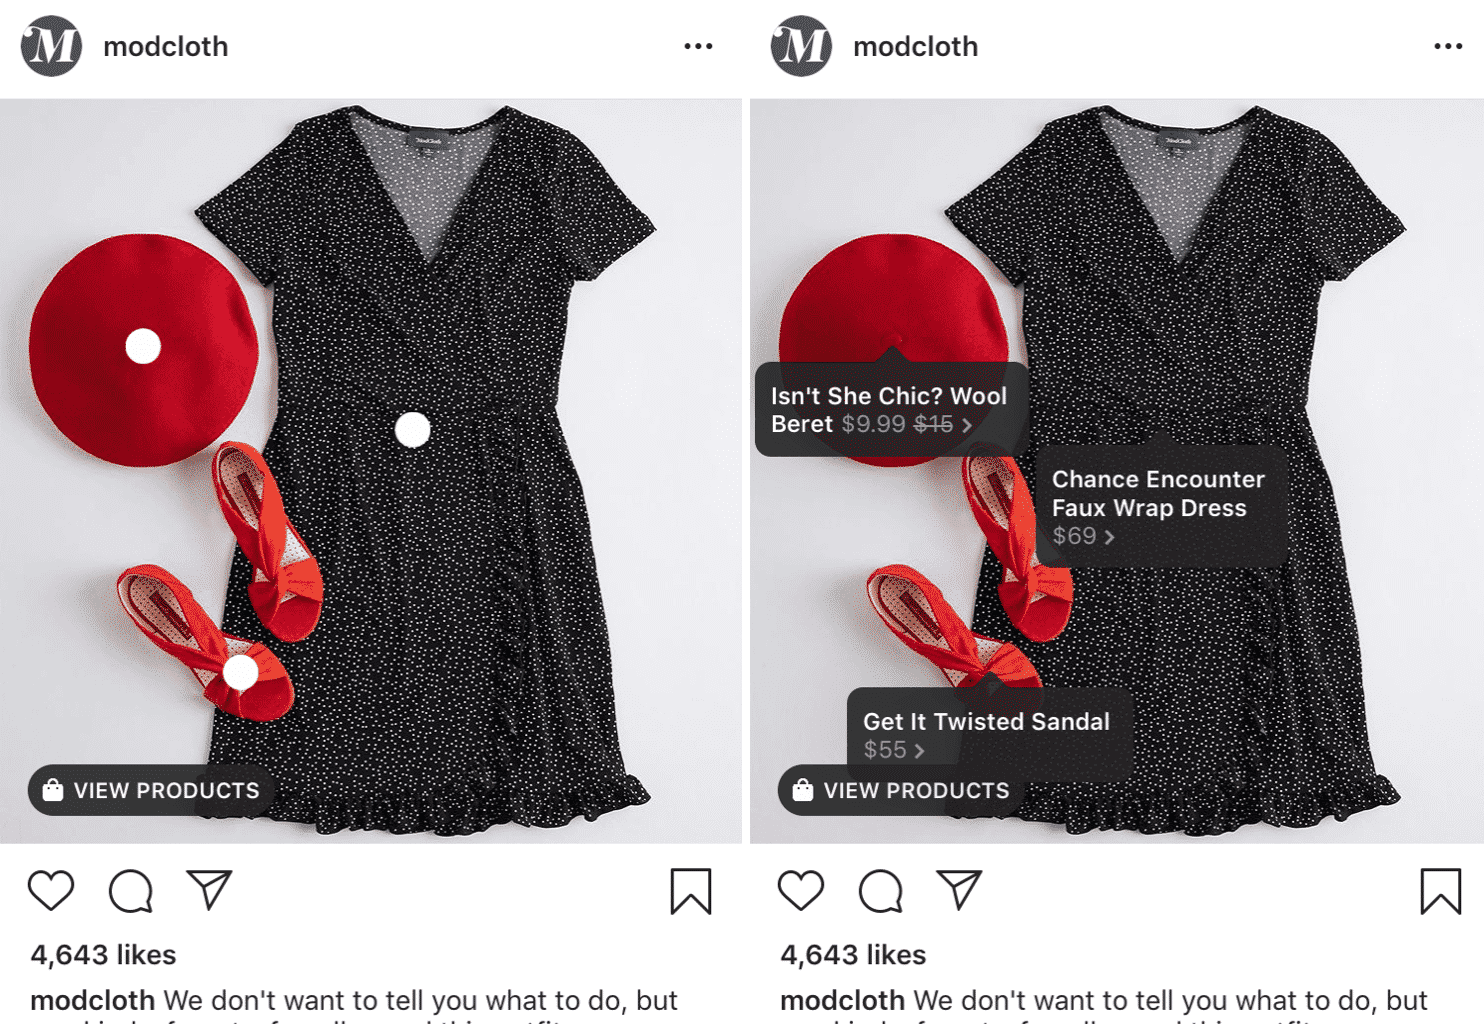
When users see a shoppable post in their feeds, they’ll be tipped off with a tiny “View Products” CTA at the bottom of the image net to a shopping bag icon. When they tap the image, they’ll see product tags for each item featured, and can click each one to learn more about the item.
This is now available for Stories, too, though the product tag here doesn’t feature price until you click on it. Since Stories go by quickly (even though they pause when users click to see more information about the tagged products), it’s good to keep these product tags as simple as possible, with no more than two items tagged per Story.

Instagram is now giving brands with Shoppable content an extra boost, with a new “Shop” navigation tab at the top of the Explore section that people use to discover new products. This can funnel users who are interested in discovering products and even purchasing to your content.
How to Set Up Shopping on Instagram
First, if you don’t already have a business account on Instagram, get one. You can convert a personal to a business profile at any time. This is required in order to set up shoppable content.
The next step will be to connect your Instagram business account to your Page and your product catalog. Once you link your product catalog to your Instagram account and it passes review again, you’ll be able to start tagging products. The waiting period on this one can be long, taking an average of around a week and sometimes a little longer.
Once you’re all set, there is no gallery in one place like on Instagram—you’ll just be tagging individual pictures.
Unlike Facebook, where you’ll benefit from images with a lot of whitespace with only the product in the middle, Instagram product tagging will work best on “lifestyle” pictures. Show that watch on a wrist, and the styling tool being used to create luscious curls. This will help your content get noticed in the newsfeed, which is an important step to getting them closer to buying.

Social Shopping on Pinterest
Pinterest is kind of the OG when it comes to native social shopping features, which isn’t a surprise since shopping is a pretty major focus on the platform. They rolled out Buyable Pins before native checkouts were available anywhere else, allowing users to click on select pins and purchase from them directly.
Now, brands can still take advantage of Buyable Pins, but even using Rich Pins can work well, too. An example of this pin can be seen here:
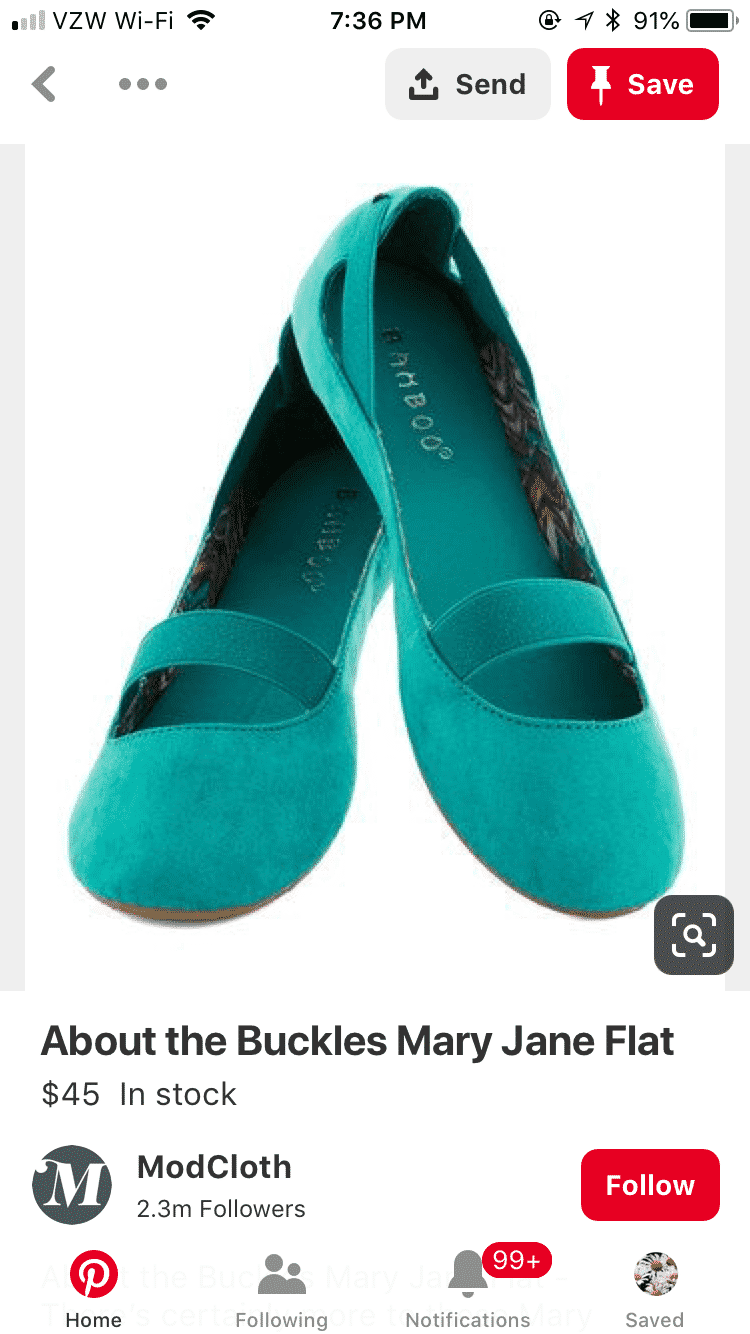
These pins are pulled from a brand’s site, featuring a product, its title, its cost, and whether or not its in stock. This information will be updated automatically; they’re rich, meaning “dynamic” in this case, so they’re not static in a way that would need manual updates. Brands can use this feature to ensure that their on-platform inventory stays relevant with accurate information without having to go through and change the info every time something changes.
How to Set Up Rich Pins with Pinterest
There are multiple types of rich pins, but e-commerce stores are going to want to focus specifically on product pins.
The first step here will be to add metadata to your site. This is essentially snippets of code that Pinterest can use to retrieve relevant information automatically. Customize the text that you see here as needed (instructions are attached!) and install it on the product pages that you want to create rich pins from. I like to use tools like WordPress’s Insert Headers and Footers since I’m not super techy, and it just requires copy and pasting.
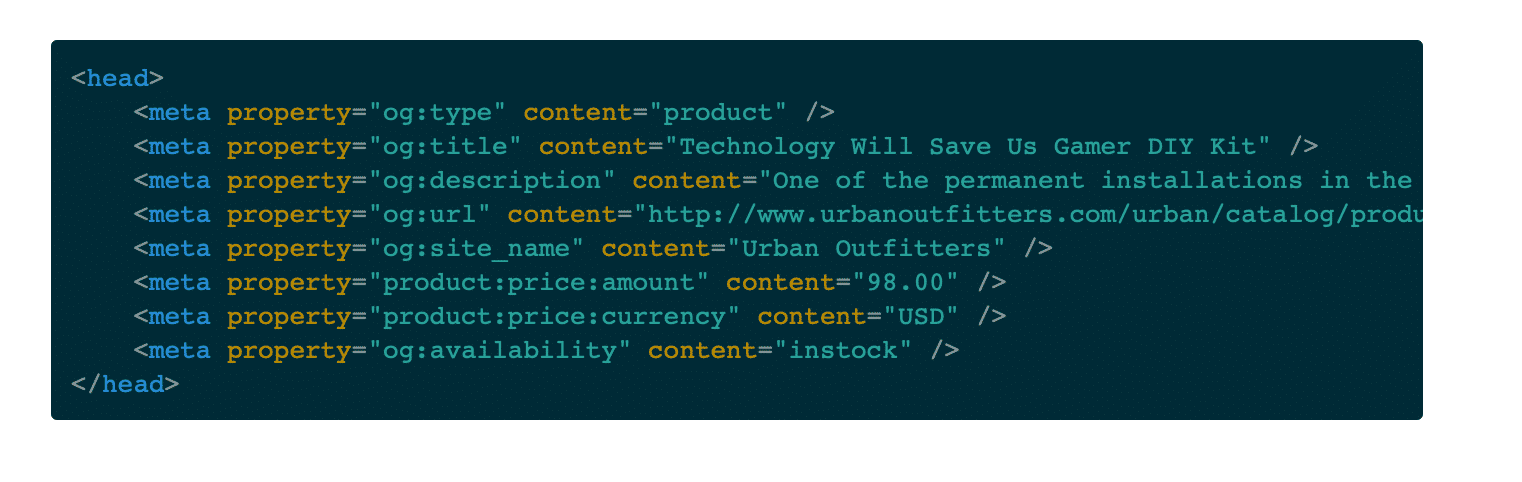
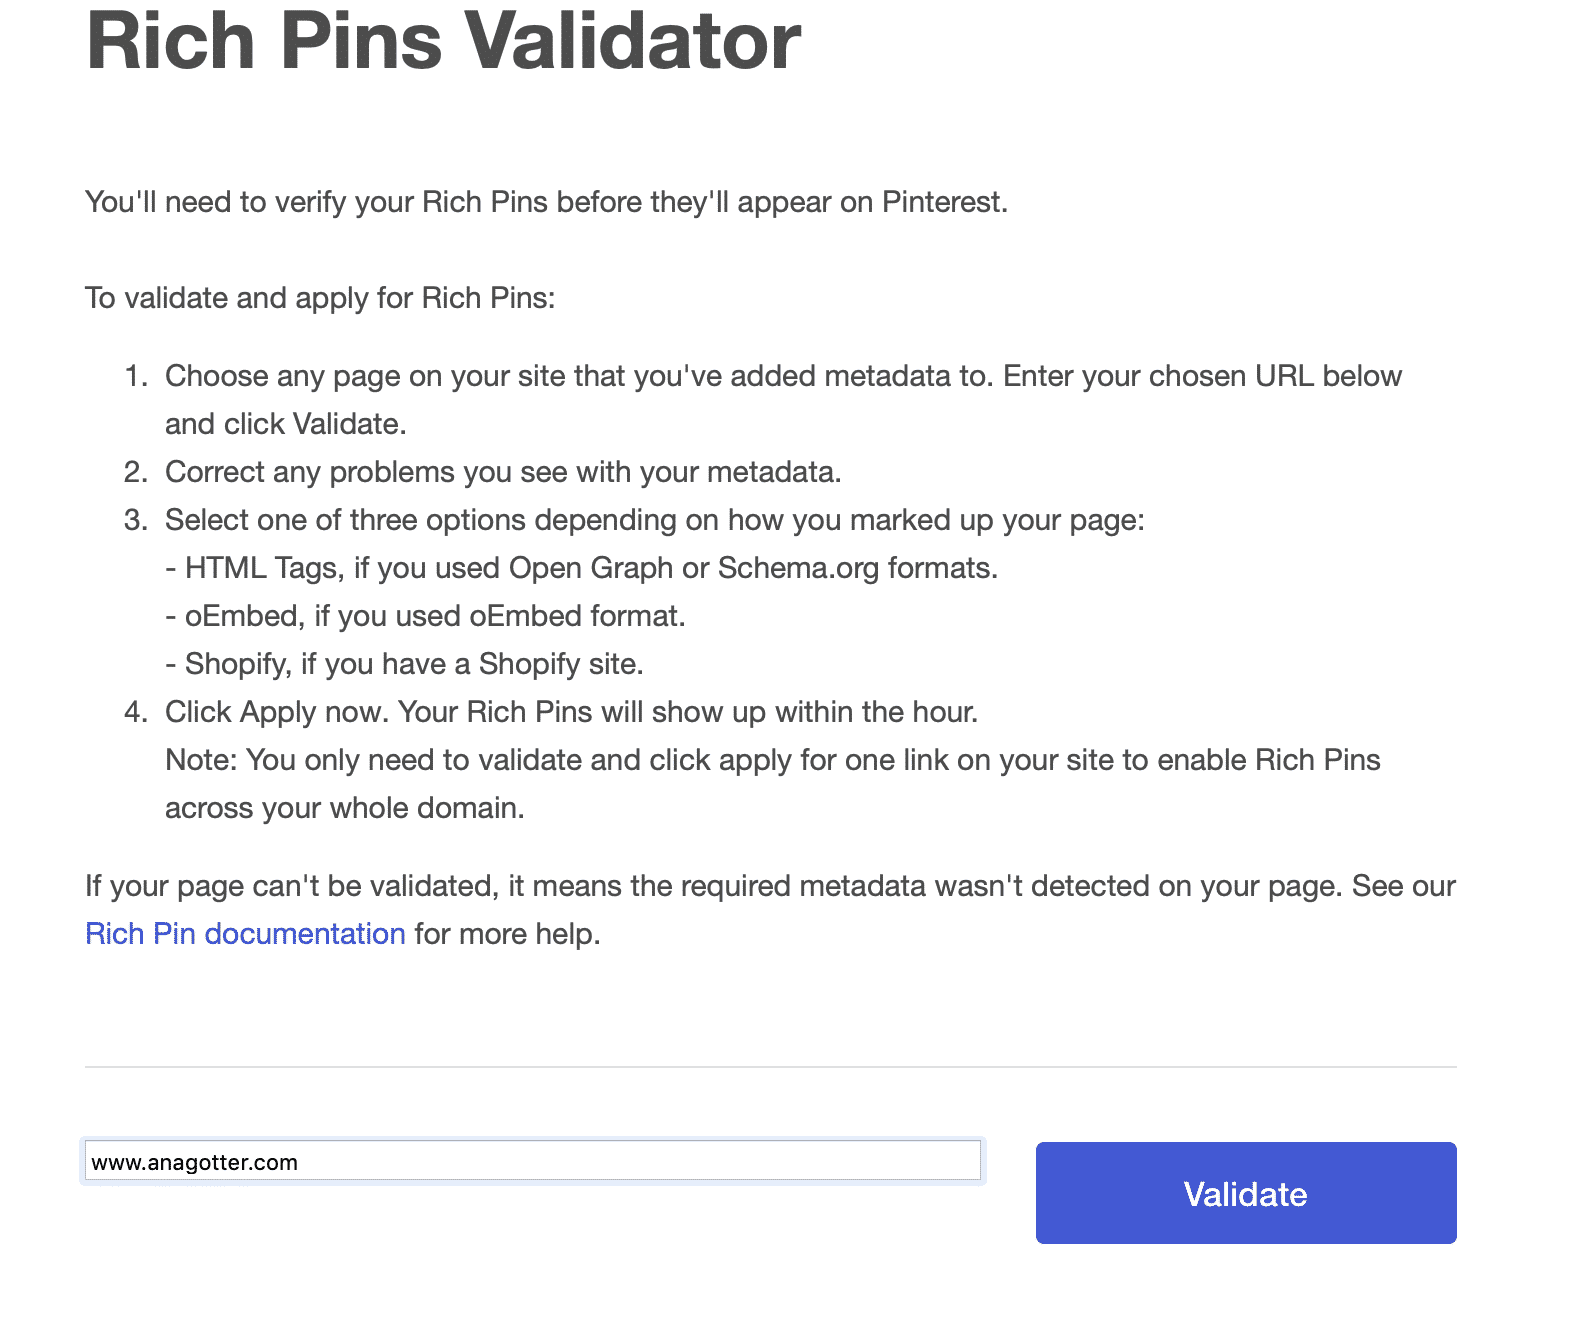
Once you have all the coding in place, go here to the Rich Pins validator. Enter in the URL of any page on your site that you’ve added the meta data to (all you need is one!) and then hit Validate. Pinterest will let you know if there are any issues, and once they go through, Pinterest will approve and display your pins within an hour.
When selling on Pinterest, one of the most important things you can do is get the image dimensions right. Pinterest recommends a 2:3 aspect ratio, having images that are taller than they are wide. These stand out more in the feed and get clicks. It’s also a good call to include text overlay featuring either your logo or brand name in the corner or towards the top or bottom of the image; this can help you build brand awareness as the pin is shared online over and over again, making it easier for people to find their way back to you if needed.
Conclusion
Social media was originally really only useful for brand awareness, but Facebook, Instagram, and Pinterest have strong, native shopping features that have been linked to effectively driving sales on the platform. While most businesses would still benefit to actively trying to draw traffic to their actual sites, having the option for users to purchase directly on the platforms they happen to be on can increase discovery and sales at the same time.
When you’re using social shopping features, take the time to optimize each image for each individual platform it’s on. You’ll need to lengthen images when turning them into pins, for example, whereas you’ll want to feature a product surrounded by whitespace for your Facebook Shop. This will help you sell as much as you can on each site.
Looking to find new ways to sell more through social media? We can help with PPC campaigns, too! Get in touch to learn more about what we can do for you.
What do you think? Do you use social shopping features to sell more? Which platform has benefited you most? Share your thoughts and questions in the comments below!


